


MACHINE ASSISTANCE
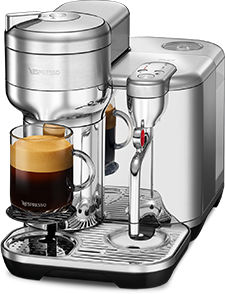
CREATISTA PRO

First Use

Drinks Menu & Selection

Drink Adjustments

Making a Milk Coffee

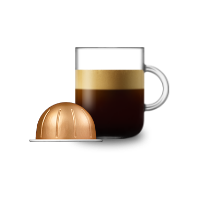
Making a Regular Coffee

Coffee Preparation Tips

Daily Cleaning

Machine Menu

Descaling

Water Hardness Levels

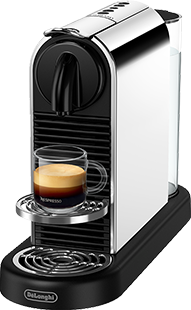
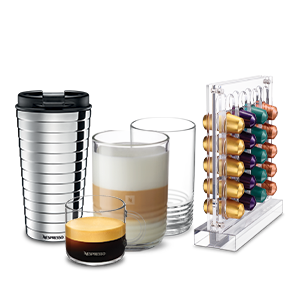
Machine Presentation

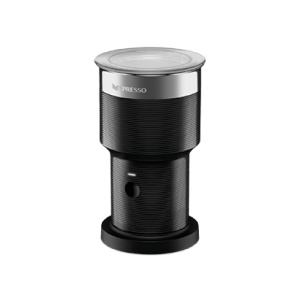
Latte Art
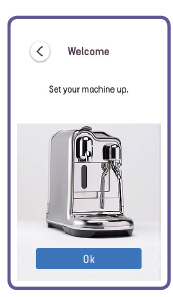
First Use
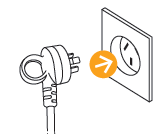
- Plug the machine into the power outlet.
- Turn the machine ON by pressing the Power button.
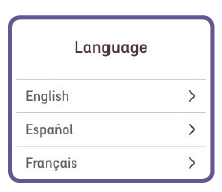
- Tap to select your language.
- Follow on-screen instructions for machine set up. First use cycle is to rinse the machine and prime the heating system.
- Follow the on-screen Quick Start Guide. Water Hardness can be manually set or the default can be used. The setting can be adjusted in the menu.
- To turn OFF your machine, press the Power button. Any drink recipe can be interrupted by turning the machine off.


Step 1 of 6
 First Use
Drinks Menu & Selection
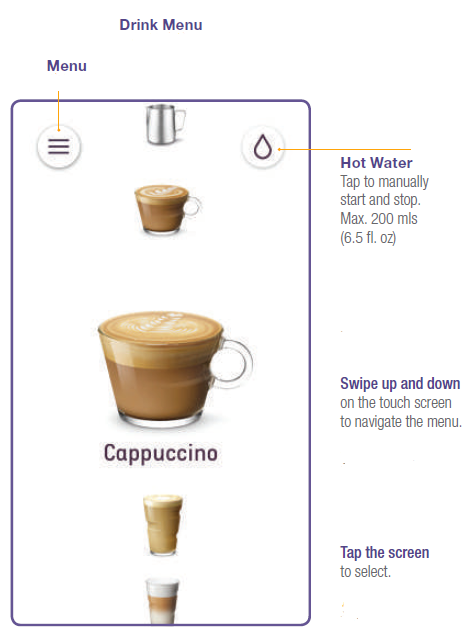
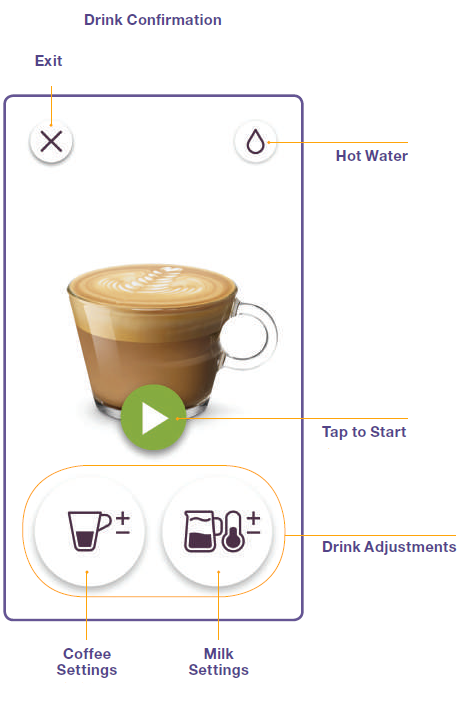
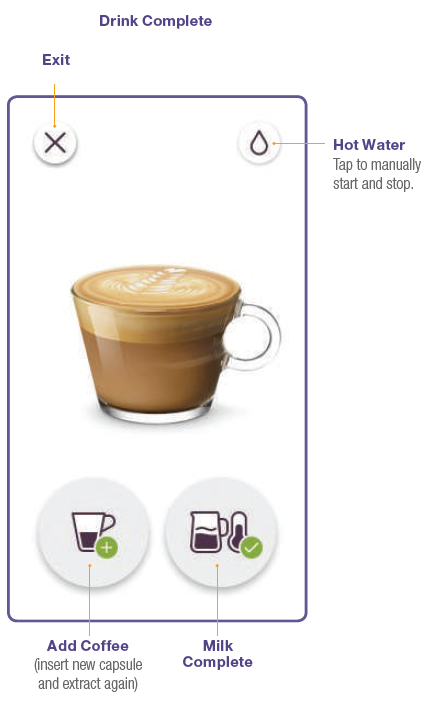
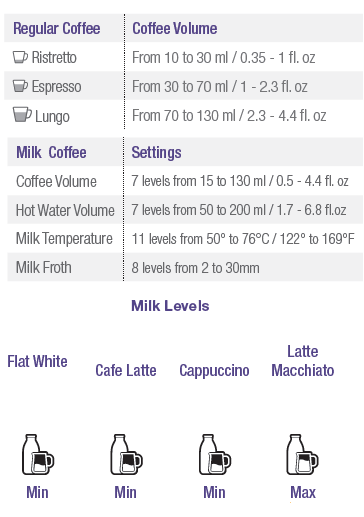
- Drink Menu. Tap the Hot Water button to manually start and stop. Max: 200 mls. Swipe up and down on the touch screen to navigate the menu. Tap the screen to select.
- Drink Confirmation.
Step 1 of 2
 Drinks Menu & Selection
Drink Adjustments
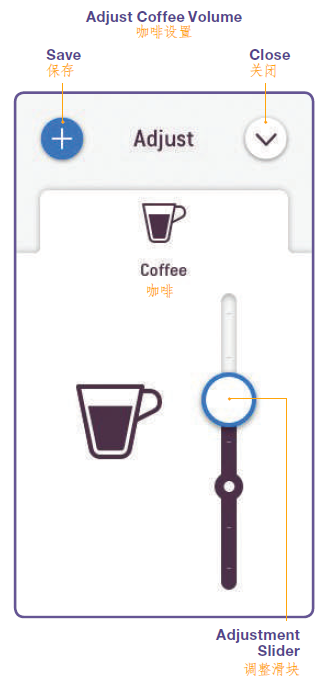
- Adjust Coffee Volume. Slide circle up and down the bar to adjust. Notch on the bar is the drink default setting. Tap + to save your custom drink settings. Custom drink will appear in Drinks Menu.
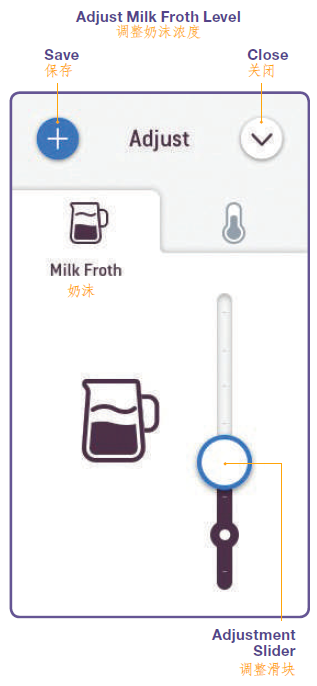
- Adjust Milk Froth Level. Slide circle up and down the bar to adjust. Notch on the bar is the drink default setting. Tap + to save your custom drink settings. Custom drink will appear in Drinks Menu.
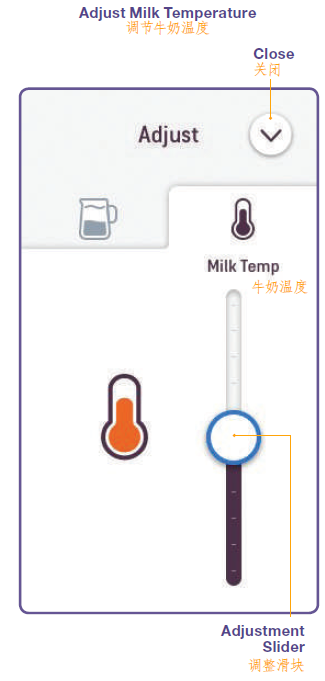
- Adjust Milk Temperature. Slide circle up and down the bar to adjust. Notch on the bar is the drink default setting. Tap + to save your custom drink settings. Custom drink will appear in Drinks Menu.
Step 1 of 3
 Drink Adjustments
Making a Milk Coffee
- Drink Running. Coffee extraction and milk texturing will start simultaneously. Coffee and milk will stop running automatically. Alternatively, tap the icon to stop.
- Drink Complete. You can Tap the Hot Water button to manually start and stop. To use the Add Coffee button you have to insert a new capsule and extract again.
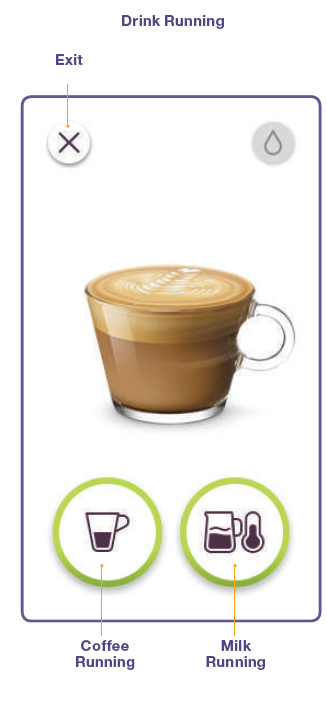
Step 1 of 2
 Making a Milk Coffee
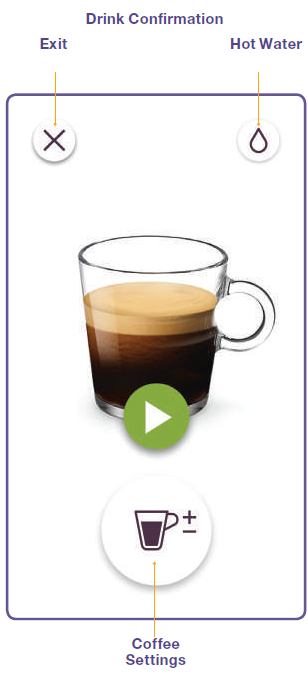
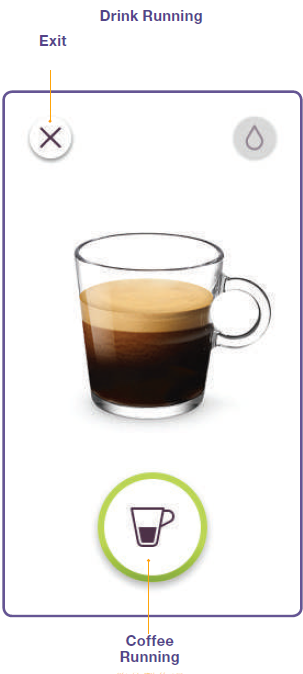
Making a Regular Coffee
- Drink Confirmation
- Drink Running. Coffee will stop running automatically. Alternatively, tap the icon to stop.
- Drink Complete. To use the Add Coffee button you have to insert a new capsule and extract again.

Step 1 of 3
 Making a Regular Coffee
Coffee Preparation Tips
- To ensure hygienic conditions, it is highly recommended not to reuse a used capsule.
- For optimal milk froth, use whole or semi skimmed UHT or pasteurized milk at refrigerated temperature (about 4-6°C / 39-43°F).
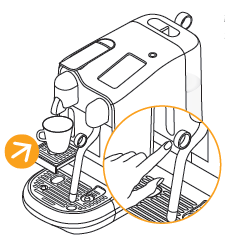
- For smaller cups, use the cup support.
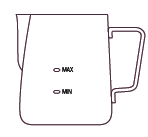
- Only use the milk jug provided for texturing milk. CAUTION: Do not fill milk jug above the maximum level marked on the inside & outside of the jug.
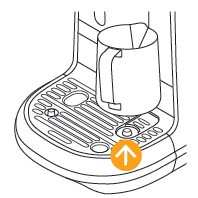
- Always ensure the milk jug is positioned on the drip tray temperature sensor when texturing milk.
- Adjusting Regular / Milk Coffee Drinks
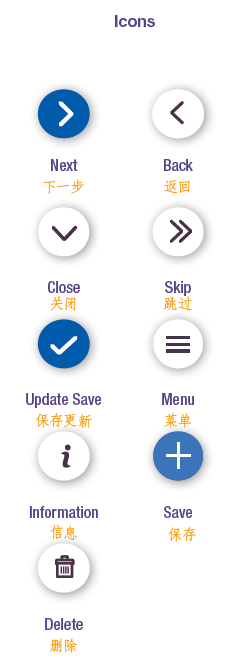
- Icons and buttons
Step 1 of 7
 Coffee Preparation Tips
Daily Cleaning
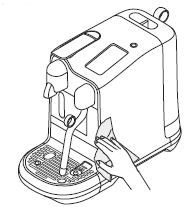
- Select Clean Steam Wand from the MENU and follow the on-screen steps
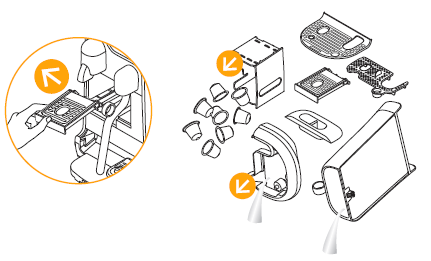
- Empty the drip tray and capsule container every day. Remove and clean the cup support and wipe inside the machine. Remove and clean the water tank with an odorless detergent and rinse with warm water.
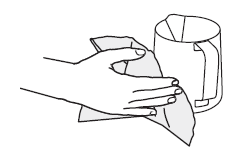
- Rinse and dry the milk jug after each use. If required, use a mild detergent.
- Dry all parts with a soft clean cloth and reassemble machine. Wipe coffee outlet and machine regularly with a clean damp cloth.

Step 1 of 4
 Daily Cleaning
Machine Menu
- Clean Steam Wand. Complete daily to clean steam paths, steam wand and prevent blockages. Tap to select and follow the on-screen instructions.
- Rinse Steam Wand. Use as required to clear any blockages that may occur in the steam wand. Tap to select and follow the on-screen instructions.
- Descale. Remove any scale build-up. Refer to Descale instructions. Tap to select and follow the on-screen instructions.
- Water Hardness. Reset the water hardness level. Tap to select and follow the on-screen instructions.
- Rinse Cycle. When machine hasn’t been used for an extended period of time. Tap to select and follow the on-screen instructions.
- Empty Cycle. When storing machine for a period of non-use or for frost protection. Tap to select and follow the on-screen instructions.
- Quick Start Guide. See the Quick Start guide again. Tap to select and follow the on-screen instructions.
- Language. Change the language of the machine. Tap to select and follow the on-screen instructions.
- Factory Reset. Erases all settings and returns unit to factory settings. Tap to select and follow the on-screen instructions.


Step 1 of 9
 Machine Menu
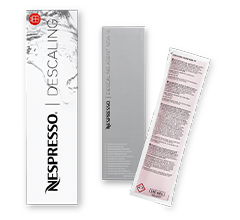
Descaling
- Duration approximately 15 minutes.
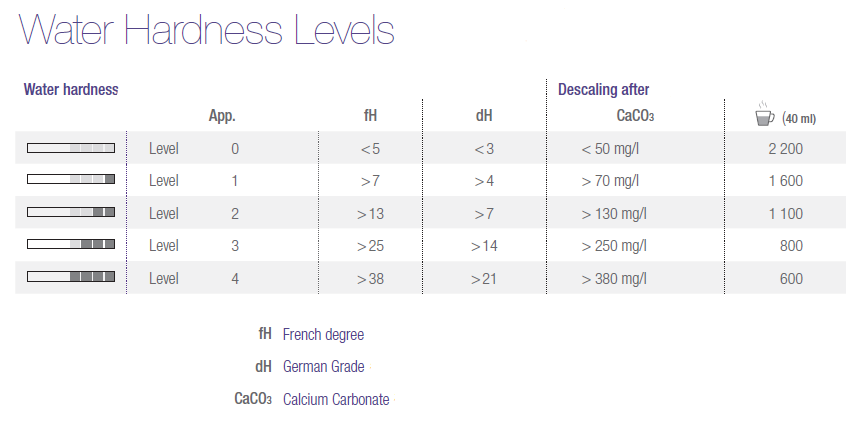
- Read the important safeguard on the descaling package and refer to the table for the frequency of use. The descaling solution can be harmful. Avoid contact with eyes, skin and surfaces. Never use any product other than the Nespresso descaling kit available at Nespresso to avoid damage to your machine. The following table will indicate the descaling frequency required for the optimum performance of your machine, based on water hardness. For any additional questions you may have regarding descaling, please contact Nespresso.
- Descaling: Removes scale build-up, maintains coffee taste and prevents machine damage. Frequency will depend on your water hardness and amount of use. Descale when prompted onscreen. The machine will stop you from use if the descale cycle has not been performed after 30 uses. A "lockout" count-down will appear to alert you of the number of uses remaining until usage will stop.
- Navigate to the Menu and select Descale. Follow the on-screen instructions.

Step 1 of 4
 Descaling
Water Hardness Levels
 Water Hardness Levels
Machine Presentation
 Machine Presentation
Latte Art
 Latte Art

Screen / buttons not illuminated.
- Machine turns OFF automatically.
- Press POWER button to turn machine ON.
- Check the outlet: plug, voltage, fuse.

No steam or hot water.
- Machine is OFF. Press POWER button to turn machine ON. - Check the outlet: plug, voltage, fuse.

No coffee, no water, unusual coffee flow.
Check if the water tank is correctly positioned, if empty, fill with fresh,
potable water.
- Descale the machine, if necessary.

Coffee is not hot enough.
Preheat cup using hot water button.
- Descale the machine, if necessary.

The capsule lever does not close completely.
- Empty the capsule container. - Check that capsules aren't blocking inside the machine. (Note: do not
place fingers inside the machine)

Leakage (water under the machine).
- Empty drip tray if full.
- Check drip tray is securely inserted.
- If problem persists, call Nespresso.

No coffee flow, water goes directly into the capsule bucket (despite inserted capsule).
- Ensure capsule lever is closed. - Empty capsule bucket and check that no capsule is blocked inside the
machine. (NOTE: do not place fingers inside the machine)
If problem persists, call the Nespresso.

Display is dim and hard to see/read.
- Screen brightness is set on a low setting.
- Press POWER button to turn ON.
- Adjust the screen brightness setting. Navigate to Menu and select Screen
Brightness.

Fill Water Tank prompt remains on screen (water tank is full).
- Check if the water tank is correctly positioned. - If problem persists, call Nespresso.

Descale alert is displayed.
- Descale the machine. - Navigate to the Menu and select Descale. Follow on-screen prompts.

Machine is ON but ceases to operate.
- Press POWER button to turn machine OFF.
- Wait 60 minutes and press POWER button to turn machine ON.
- If problem persists, call Nespresso.

Touchscreen is not working.
- Press POWER button to turn machine OFF. Press POWER button again
to turn machine ON.
- If problem persists, call Nespresso.

Touch screen is in instore mode.
- To exit instore mode, press POWER button to turn machine OFF. Press
POWER button again to turn machine ON.

Milk steam cycle does not start.
- Check if the water tank is correctly positioned, if empty, fill with fresh
potable water.
- Check steam tip for any blockages and ensure wand is lowered.

Quality of froth not up to standard.
- For optimal milk froth, use whole or semi skimmed UHT or pasteurized
milk at refrigerated temperature (about 4-6°C / 39-43°F).
- Check the milk froth setting.
- Use the provided milk jug.
- Clean both the milk jug and steam wand after each use.
- Complete Steam Wand Cleaning Cycle. Navigate to the Menu and select
Clean Steam Wand, follow the on-screen prompts.

Steam is very wet.
- Use fresh, potable water.
Do not use highly filtered, demineralised or distilled water.

Milk overflows.
- Fill jug with appropriate milk volume. DO NOT fill above the MAX level.
- Minimum and maximum levels are marked on the inside and outside
of the jug.
- To stop overflow, either reduce the initial volume of milk and/or reduce
the froth level. This varies depending on milk type.

Milk temperature is too hot.
- Use the milk jug provided.
- Check the milk jug is positioned correctly on the milk jug temperature
sensor in the drip tray.
- Check the temperature sensor in the drip tray is dry and clean.
- Decrease the milk temperature setting

Milk temperature is not hot enough.
- Preheat cup.
- Use the provided milk jug.
- Check the milk jug is positioned on the temperature sensor in the
drip tray.
- Increase the milk temperature setting.
- Check the steam tip for blockages.

Clean Steam Wand alert is displayed.
- Clean the steam wand. - Navigate to the Menu and select Clean Steam Wand. Follow the on-screen
prompts.


