


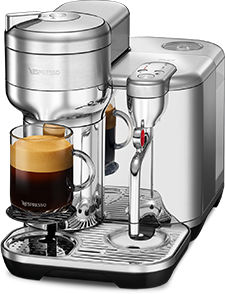


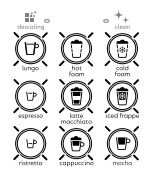
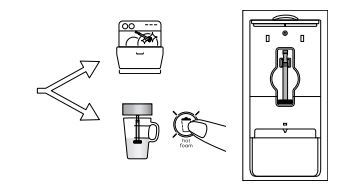
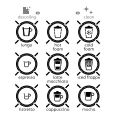
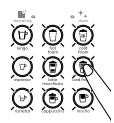
MACHINE ASSISTANCE
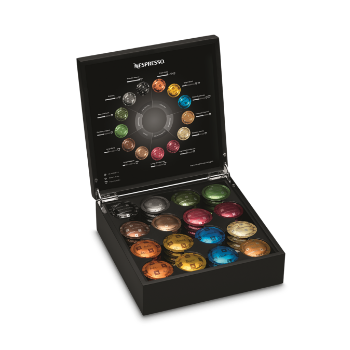
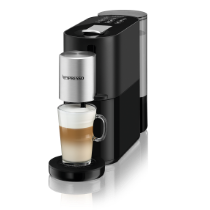
ATELIER
First use or after a long period of non-use
Water hardness setting
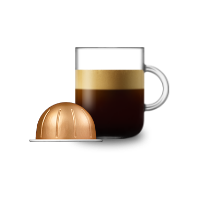
Coffee preparation
Assembly / Disassembly of the milk froth
Milk recipe preparations when using a Nespresso VIEW mug (270ml)
Milk recipe preparations when using your personal cup
Programming coffee volume
Reset to factory settings
Automatic power saving setting
Daily maintenance
Descaling
Priming, after emptying or unpriming
Emptying the system before a period of non-use, for frost protection or before a repair
 First use or after a long period of non-use
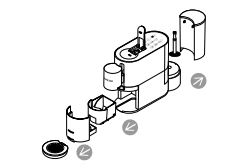
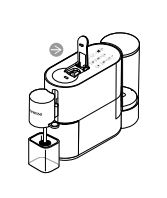
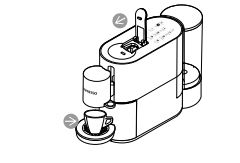
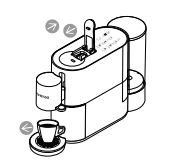
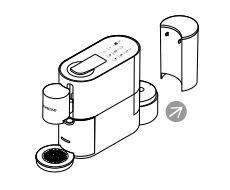
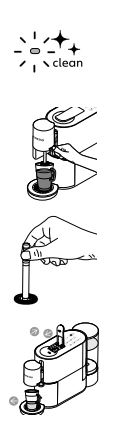
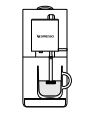
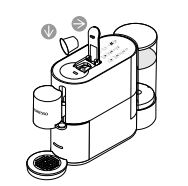
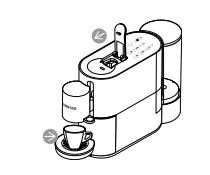
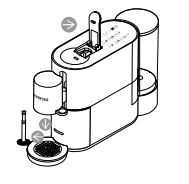
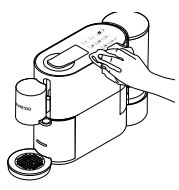
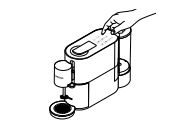
- When unpacking the machine, place it on a horizontal, stable, uncluttered work surface. Remove the water tank, drip tray, drip base and capsule container. Remove the milk frother from its storage.
- Position the cord to the right or left of the machine (according to your preference) by using the housing intended for this purpose under the machine.
- Plug the machine into the mains.
- Rinse the water tank before filling it with fresh drinking water
- Place the water tank on its base, then insert the capsule container and the drip tray. Place the milk frother. *Refer to the “Assembly/Disassembly of the milk frother” paragraph.
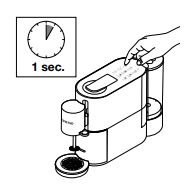
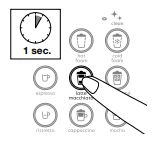
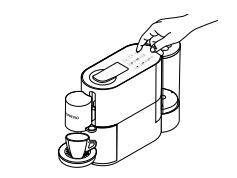
- Turn on the machine by pressing one of the 9 keys for 1 second
- The 9 recipes keys blink. The machine is in startup mode. If only 3 keys are blinking, check that the milk frother is properly inserted.
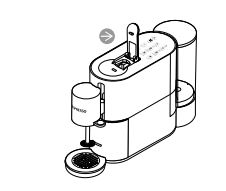
- Place a container (600 ml) under the head
- Lift the lever and leave it in an open position
- Press one of the 9 keys. The 9 keys blink quickly. Some water may flow from the milk frother for a few seconds.
- Priming is completed. Lower the lever
- Light will blink while the machine is heating up. Steady light indicates the machine is ready for rinsing.
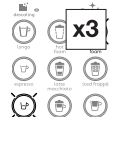
- Press the Lungo key to rinse the machine. Repeat this operation three times. Next, press the Hot Foam key to clean the steam circuit. The machine is ready for use. *All our machines are fully tested after having been manufactured. Traces of coffee may be visible in rinsing water

Step 1 of 13
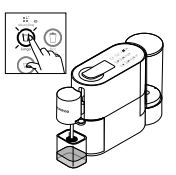
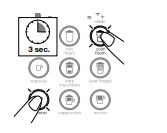
 Water hardness setting
- The machine automatically exits from the Water Hardness Setting Menu mode. NOTE: the Water Hardness Setting Menu mode deactivates after 15 seconds of inactivity.
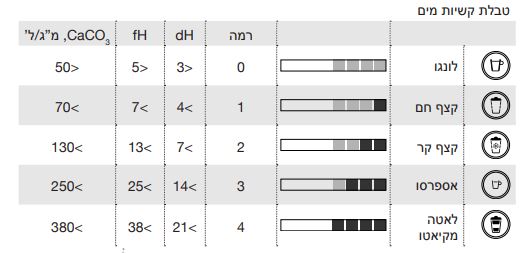
- Water hardness table
- Turn on the machine by pressing one of the 9 keys for 1 second.
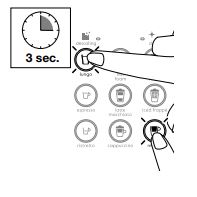
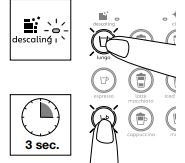
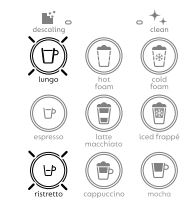
- Simultaneously press the Cold Foam + Mocha keys for 3 seconds: the "Descaling" and "Clean" alert indicator lights light up and the Lungo, Hot Foam, Cold Foam, Espresso and Latte Macchiato keys blink.
- Press the key that matches the hardness measured. The key blinks 3 times to confirm the new selected value


Step 1 of 5
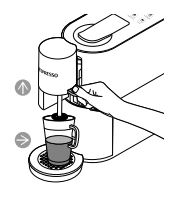
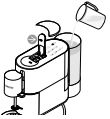
 Coffee preparation
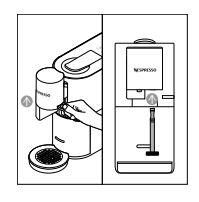
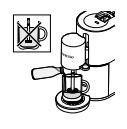
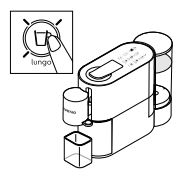
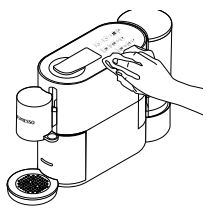
- Turn on the machine by pressing one of the coffee keys (Ristretto, Espresso, Lungo)
- Lift the lever completely and insert a capsule.
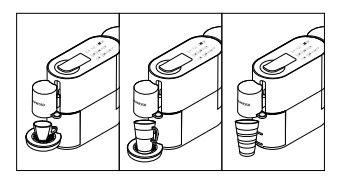
- Close the lever and place a cup under the coffee outlet.
- Adjust the position of the drip tray according to your cup. Make sure the drip tray is properly placed.
- Press the Ristretto, Espresso or Lungo key. The selected key blinks while the coffee is flowing and lights up steadily once the recipe is done. The preparation will stop automatically. To stop the coffee flow at any time, press the selected recipe key again. *To top up your coffee, press the selected recipe again.
- Once preparation done, take the cup. Lift and close the lever to eject the capsule.
Step 1 of 6
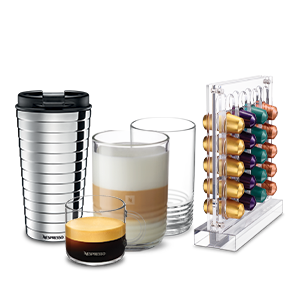
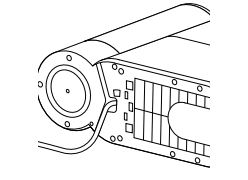
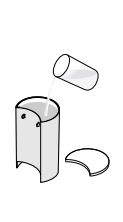
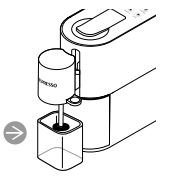
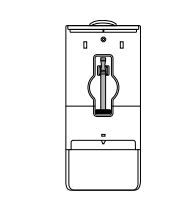
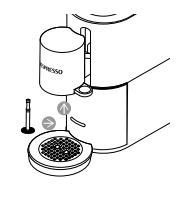
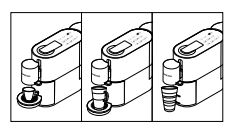
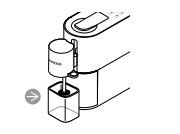
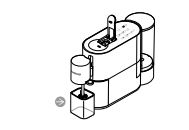
 Assembly / Disassembly of the milk froth
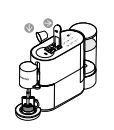
- Remove the water tank
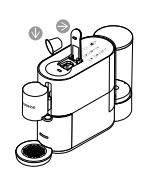
- Remove the milk frother from its housing behind the machine.
- Lift up the head. Insert the milk frother in the connection and push it in all the way. The milk-based recipes keys will light up when the milk frother is detected.
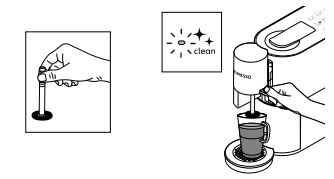
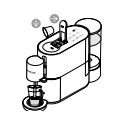
- Once the preparation is completed, the "Clean" alert lights up orange. Lift up the head, remove the milk frother by means of its grip area, the ‘‘Clean’’ indicator light turns off.
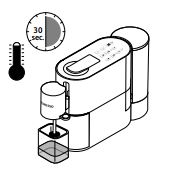
- To clean the milk frother, place the Nespresso View mug filled with 100ml of fresh drinking water under the head of the machine, insert the milk frother, lower the head and press the “hot foam” key. You can also simply clean the milk frother by dishwashing. Put the milk frother back in its housing.
Step 1 of 5
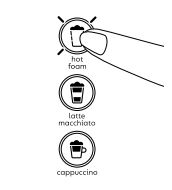
 Milk recipe preparations when using a Nespresso VIEW mug (270ml)
- Lift up the head using the handle and place the milk frother. *Refer to the “Assembly/Disassembly of the milk frother” paragraph.
- Put the ingredients and the milk according to the recipe you want to prepare in your VIEW mug (see the recipes page). Place it under the head and lower the head until the milk frother is immersed.
- Only when preparing a milk recipe with coffee, completely lift the lever and insert a capsules. Close the lever.
- Press the recipe key. The milk frothing starts automatically. The selected recipe key blinks slowly while it is being prepared.
- Only when preparing a recipe with coffee: once the milk frothing is done, the coffee will automatically flow
- Once the preparation is completed, the "Clean" indicator light lights up orange. Lift up the head, remove the milk frother by means of its grip area. The "Clean" indicator light turns off. Clean the milk frother by diswashing or hand washing. Put the milk frother back in its housing
- Take the cup. Lift and close the lever to eject the capsule when preparing a recipe with coffee.
Step 1 of 7
 Milk recipe preparations when using your personal cup
- Lift the head of the machine and place the milk frother. *Refer to the “Assembly/Disassembly of the milk frother” paragraph.
- Put the drip tray on the high position. If your mug is too tall to fit under the head of the machine, place the drip tray in the low position or remove the drip tray.
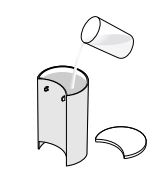
- Put in your cup the ingredients and the milk according to the recipe that you want to prepare, place it under the head of the machine and lower it.
- If the milk frother isn’t immersed in the milk, ajust the quantity of milk in a way that it reaches the surface of the milk frother. The milk must never fill more than half of the cup.
- Only when preparing a milk recipe with coffee, completely lift the lever and insert a capsules. Close the lever
- Press the recipe key. The milk frothing starts automatically. The selected recipe key blinks slowly while it is being prepared.
- Only when preparing a recipe with coffee: once the milk frothing is done, the coffee will automatically flow. *The Espresso key lights up at the end of the preparation for top up your coffee
- Once the preparation is complete, the "Clean" indicator light lights up orange. Lift up the head, remove the milk frother by means of its grip area. The "Clean" indicator light turns off. Clean the milk frother.
- Take the cup. Lift and close the lever to eject the capsule when preparing a recipe with coffee
Step 1 of 9
 Programming coffee volume
- The programmed key blinks rapidly 3 times to confirm the new setting. The coffee volume level is now stored.
- Turn on the machine by pressing one of the coffee keys (Ristretto, Espresso, Lungo)
- Lift the lever completely and insert a capsule
- Close the lever and place a cup under the coffee outlet
- Press and hold the Ristretto, Espresso or Lungo key. Release the key as soon as the desired volume is reached.
Step 1 of 5
 Reset to factory settings
- Turn on the machine by pressing one of the coffee keys (Ristretto, Espresso, Lungo).
- Simultaneously press the Lungo and Mocha keys for 3 seconds to activate the Factory Settings Menu. The Lungo and Mocha keys blink 3 times.
- The factory settings are restored. The machine automatically exits from the Factory Settings Menu mode.
Step 1 of 3
 Automatic power saving setting
- The machine automatically exits from the Automatic Power Saving Setting Menu mode. NOTE: the Automatic Power Saving Setting Menu mode deactivates after 15 seconds of inactivity.
- Turn on the machine by pressing one of the coffee keys (Ristretto, Espresso, Lungo)
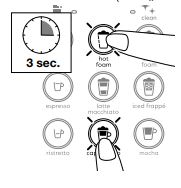
- Simultaneously press the Hot Foam + Cappuccino keys for 3 seconds to go to the Automatic Power Saving Setting menu: the "Descaling" and "Clean" alert indicator lights are lit, and the Hot Foam, Latte Macchiato and Cappuccino keys blink.
- Press one of the Hot Foam, Latte Macchiato and Cappuccino keys to select the desired automatic power off time. You have 15 seconds to program the desired value by pressing the corresponding key.
- The programmed key blinks 3 times to confirm the new selected value.

Step 1 of 5
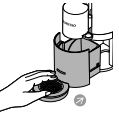
 Daily maintenance
- Lift and close the lever to eject the capsule. Remove the milk frother.
- Gently pull on the drip tray to remove the drip base and the capsule container at the same time. Empty them, rinse them using drinking water, dry them using a clean, damp cloth, then put them back in place
- Remove the water tank, fill it with fresh drinking water. Place a container under the coffee outlet (600 ml), press the Lungo key to rinse the machine
- Clean the coffee outlet and the milk frother connection using a clean, damp cloth.
- Clean the machine using a clean, damp, non-abrasive cloth.

Step 1 of 5
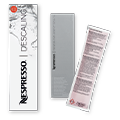
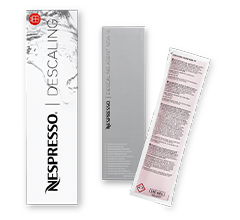
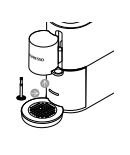
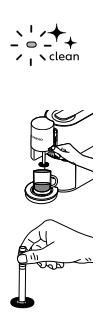
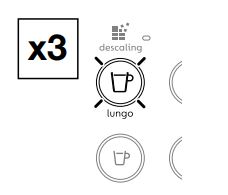
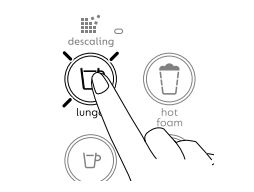
 Descaling
- Descale your machine when the "Descaling" alert indicator light blinks.
- Lift and close the lever to eject the capsule
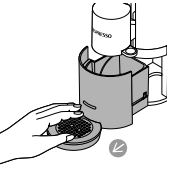
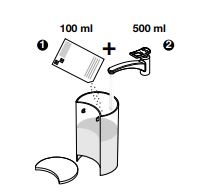
- Empty the drip tray, drip base and capsule container. Fill the water tank with 500 ml of fresh drinking water. Pour 1 pouch of Nespresso liquid descaling agent into the water tank.
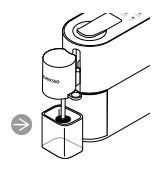
- Insert the milk frother
- Place a minimum 1L container under the head
- To enter the descaling mode, simultaneously press the Lungo + Ristretto keys for 3 seconds. Both keys blink. To start the descaling program press the same keys again.
- The descaling liquid alternatively flows from the coffee outlet and from the milk frother.
- Once the descaling cycle is done (the water tank is empty), the Lungo + Ristretto keys blink.
- Rinse the water tank and completely fill it with fresh drinking water.
- Press the Lungo + Ristretto keys again. Rinsing continues via the coffee outlet and the milk frother. The Lungo + Ristretto keys blink.
- Once rinsing is done, the machine goes back to ready mode and the "Descaling" alert indicator light shuts off. Remove and store the milk frother in its housing. Fill the water tank with fresh drinking water
- Clean the machine using a damp cloth. You have completed the machine’s descaling.


Step 1 of 12
 Priming, after emptying or unpriming
- Insert the milk frother.Turn on the machine by pressing one of the 9 keys for 1 second.
- The 9 recipes keys blink non-stop.
- Place a container (600 ml) under the head of the machine.
- Lift the lever and leave it in an open position.
- Fill the water tank and put it back in place
- Press one of the 9 keys. The 9 keys blink quickly
- Some water may flow from the milk frother for a few seconds
- Once priming is completed, the machine returns to “Ready for use” mode.


Step 1 of 8
 Emptying the system before a period of non-use, for frost protection or before a repair

No light on the keys and indicator lights

The

When you press the recipe key, it does not start and the

During descaling, the Lungo + Ristretto keys blink and the

The 9 keys blink quickly non-stop.

The recipe key blinks rapidly during preparation.

The milk foam is insufficient.

Milk-based recipes keys do not light up

Milk overflows from the mug during preparation.

The

The lever does not fully close.

Leakage around the capsule (water present in the capsule container).

No coffee, no water.

The coffee flows very slowly.

No coffee, only water is flowing (despite having inserted a capsule).

The coffee is not hot enough.

Cannot go to the Menu Mode (e.g.

Irregular blinking
